 Loading... Please wait...

Recent Posts
Gas Powered Scooters: Post Delivery Inspection Guide
Posted by on
Unpacking and assembling your gas powered scooter
Your gas powered scooter will arrive inside a metal crate. The crate is packed inside a cardboard box.
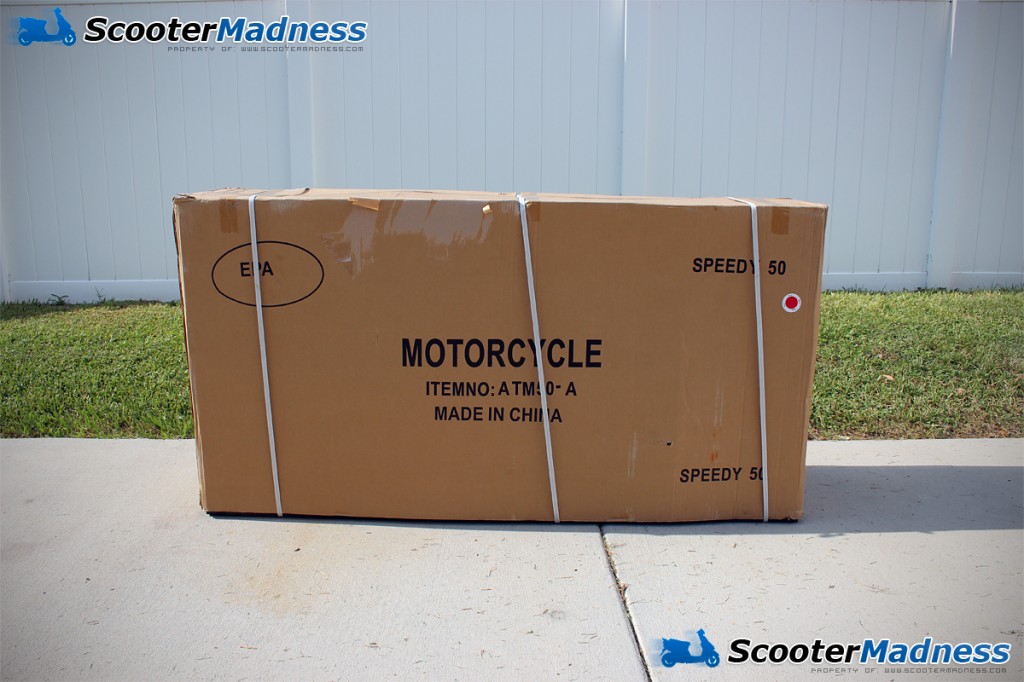
1.Separate the cardboard box from the metal crate.
2.Unbolt the scooter from the crate, working from the top down.
3.Free the scooter from the crate by cutting additional shipping wires (used to hold the scooter in place).
4.Most scooters ship with the front wheel unattached, but if your wheel is attached, free the front wheel by unbolting the front axle from the crate.
Gas powered scooter assembly: locating and charging the battery
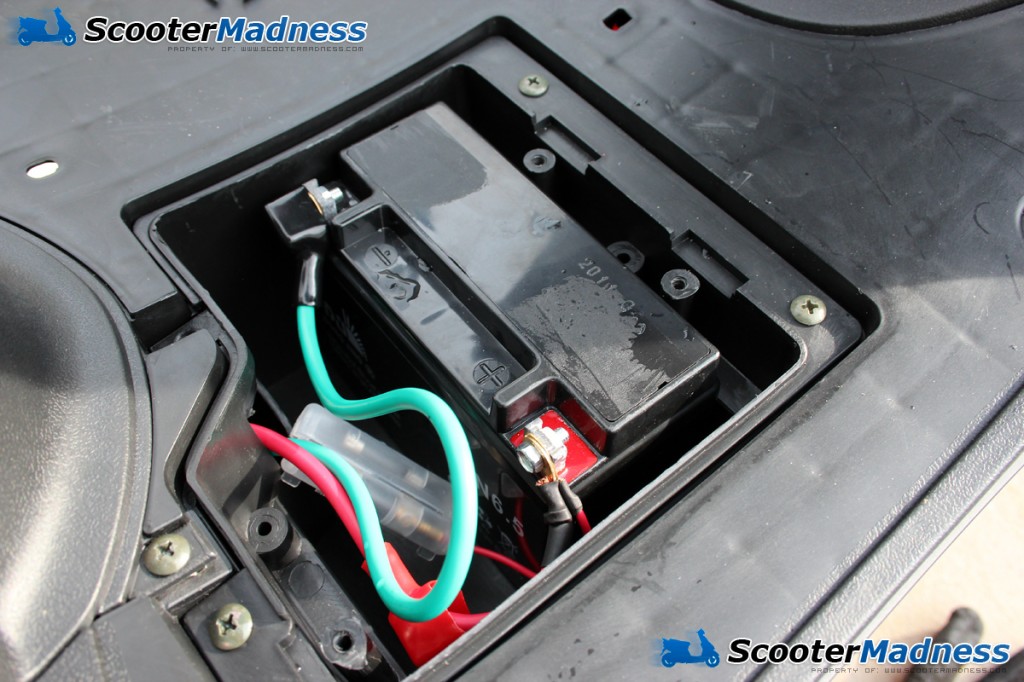
Your gas powered scooter includes “starter” battery. Within the first 100 miles, we recommend you replace the battery with a more reliable version that can be purchased from an auto parts store. The battery that ships with your scooter is best suited for starting the scooter and completing this inspection only.
Locate the battery (check under the seat if you do not find the battery elsewhere). Follow the battery assembly and charging instructions carefully. While the battery charges, complete the remaining assembly steps below.
Gas powered scooter assembly: installing the front wheel
Carefully stand your scooter up. This may require the help of another person or additional supports.
1.Remove any shipping spacers that you see between the front brake pads.
2.Guide the front wheel into the front fork and past the brake caliper. It is not necessary to remove the caliper to install the front wheel. The brake disc should slide between the brake pads.
3.On the side of the front wheel with the brake disc, there may be a metal spacer between the hole in the fork and the wheel. On the other side, there may be another spacer (along with the speed sensor, which is connected to the speedometer). Locate both spacers (if present) and move on to the next step.
4.The speed sensor typically has notches in it that line up with a peg on the front fork. The inside of the speed sensor also has two tabs that line up with the two tabs on the front wheel.
5.Line up the tabs on the speed sensor and the front wheel. Then line up the speed sensor with the pegs on the front fork and slide the wheel into position.
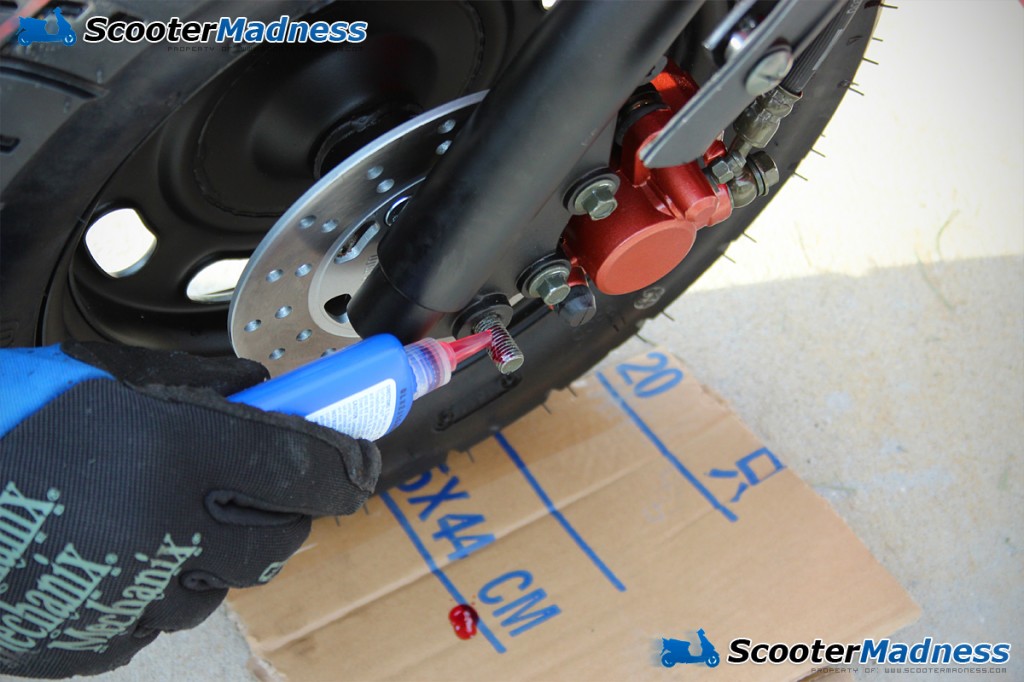
6.Slide the axle bolt through the assembly. If should slide in easily but may require a few taps from a rubber mallet.
7.Once the axle bolt is through, apply a few drops of thread lock on the threads.
8.Tighten the axle bolt according to specs provided in the owner’s manual.
Gas powered scooter assembly: changing the fluids and plug
Our friend Matt at Rolling Wrench has a Chinese scooter upgrade kit that we highly recommend buying and installing. Check out the video below.
The engine oil that arrived in your scooter is for shipping purposes only. TaoTao USA recommends changing the oil with 10W-40. Matt, an experienced scooter mechanic, recommends 20W – 50 “V-Twin” oil. “V-Twin” refers to the engine configuration of Harley-Davidson motorcycles, which are also air cooled and tend to be run hard for long periods of time.
- As mentioned, the oil that ships with your scooter is for shipping purposes only. However, removing the drain plug is often easier once the engine has been started and warmed up (run for 3 to 5 minutes). If you experience problems removing the drain plug, try running the scooter for a short time (the shipping oil is sufficient for this purpose). Be sure to check the gas tank for styrofoam or debris prior to adding fuel (93 octane).
- Remove the engine oil dipstick and place a container under the scooter (to catch engine oil as is drains).
- Once the drain plug has been removed, you should see a spring and screen assembly (part of the oil filtration system). Set the assembly aside and be sure to reinstall this assembly prior to reinstalling the drain plug. If the assembly falls into the engine oil container, use a magnet or pliers to retrieve.
- Once the oil has drained, reinstall the screen in the spring and attach the drain plug. Be careful not to over tighten.
- Add the required amount of engine oil as specified by your owner’s manual (usually 3/4 of a quart).
- It is also a good idea to change the gear box oil at this time. Locate the drain plug and remove. Note: the gear box oil often flows freer once the scooter has been run for 3 to 5 minutes.
- Reinstall the gear box oil drain plug and fill with quality 80W-90 gear box oil.
- Locate and remove the spark plug. Replace with an NGK plug from a nearby small engine supply/service store, motorcycle shop, auto parts store or similar supplier.
Check out our oil change video below.
Here is a walk-through on how to change your Scooter Gear Oil:
Gas powered scooter assembly: replacing the valve stems
The valve stems that come with your gas powered scooter will hold air, but may deteriorate over time. We recommend you bring you scooter to a local tire shop and have them inspect/replace your tire stems with a one-part design.
Gas powered scooter assembly: pre-ride check
Walk around the scooter and check for leaks of any sort. Investigate and repair as necessary. Following the steps above helps to ensure many years of uninterrupted service.
TaoTao’s Full Official PDI Guide
It is recommended that you check all nuts and bolts and use loctite on all important frame nuts and bolts, check hoses and lines, and a few other checks for safety outlined in the full TaoTao’s Official Post Delivery Inspection Guide (PDI). Please make sure you adhere to these guidelines, as these are the adjustments that a dealer would make if the scooter were purchased uncrated and assembled with a PDI.


